A double trolley electric wire rope hoist is a critical lifting component widely used in double girder overhead cranes, gantry cranes, workshops, and heavy-duty material handling systems. Compared with a standard single trolley hoist, the double trolley design provides better load distribution, improved stability, and higher lifting reliability for heavy loads.
However, proper installation is essential to ensure safe operation, accurate positioning, and long service life. Incorrect trolley adjustment, improper wire rope installation, or incorrect limit switch settings may affect equipment performance or even create safety risks.
This guide explains the complete double trolley electric wire rope hoist installation procedure, based on an actual installation process, including trolley assembly, electrical wiring, wire rope installation, limit switch adjustment, and final testing.
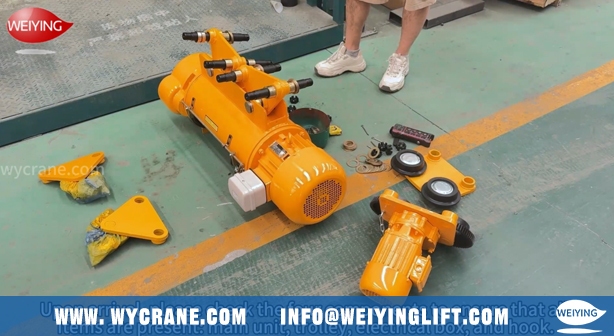
Before starting installation, inspect all delivered components and confirm that all parts are complete.
The main components of a double trolley electric wire rope hoist usually include:
Checking components before installation helps prevent delays caused by missing parts and ensures all components match the installation requirements.
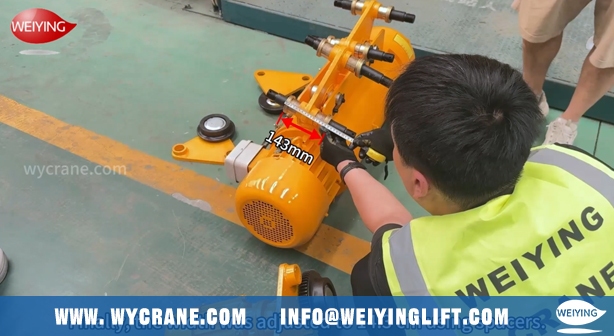
The first step of mechanical installation is adjusting the trolley width according to the crane beam track.
Before installation:
In this installation example:
Correct trolley adjustment ensures smooth movement and prevents excessive wear on wheels and tracks.
After adjusting the trolley width, connect the trolley assembly with the electric hoist.
Installation steps:
The final clearance between the trolley gears should be checked before operation.
During installation, the motor-driven trolley side should be installed on the same side as the limit switch to ensure correct operation.
After mechanical assembly, install the electrical components.
The procedure includes:
Before operation, add the required amount of gear oil into the gearbox according to the manufacturer’s instructions.
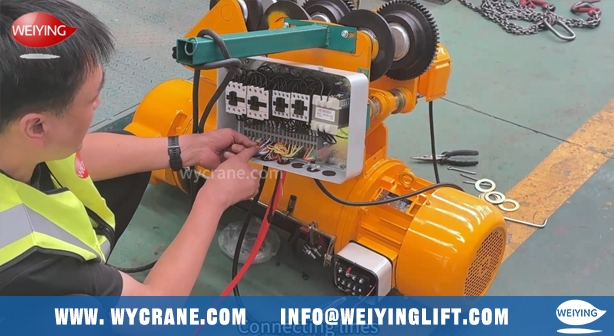
Correct electrical connection is essential for safe operation.
The wiring process includes:
Connect the power cable to the terminals inside the control box.
Typical wiring sequence:
Secure any excess cable using the provided bracket to prevent cable damage during operation.
Connect the three-core cable from the electrical cabinet to the trolley motor.
The phase sequence of the three wires does not require a fixed order. If the trolley moves in the wrong direction, adjust the wiring sequence accordingly.
After completing trolley assembly and electrical connections:
Make sure the trolley wheels are properly aligned before performing operation tests.
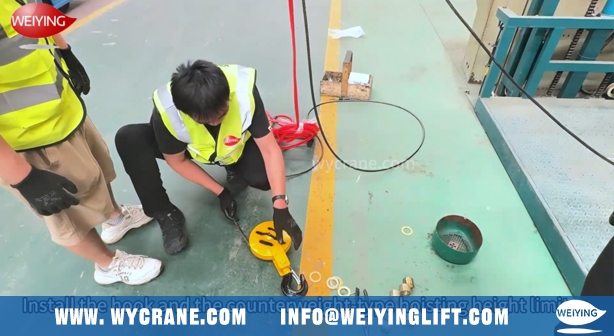
The wire rope installation is one of the most important steps.
Installation procedure:
Incorrect wire rope installation may cause rope slipping, uneven winding, or damage to the rope guide.
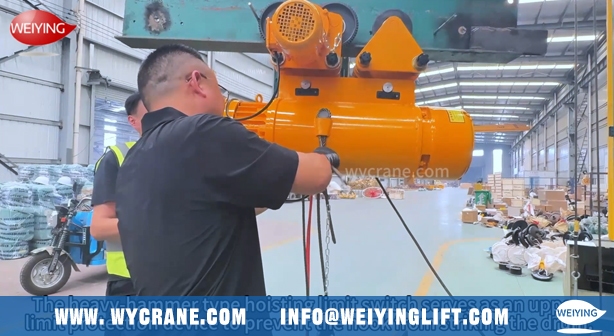
The heavy hammer lifting limit switch provides additional protection for the upper lifting position.
Its main function is:
Adjustment steps:
During testing:
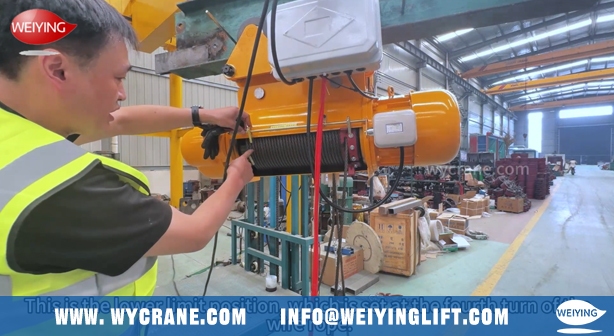
The lower limit position should also be adjusted according to working requirements.
In this installation example:
The actual lower limit can be adjusted depending on:
Always keep sufficient wire rope remaining on the drum during the lowest position.
Before putting the equipment into operation, perform a complete test.
Important testing requirements:
✔ Check lifting and lowering movement
✔ Check trolley traveling operation
✔ Test upper and lower limit switches
✔ Check electrical control functions
✔ Confirm abnormal noise or vibration does not occur
During initial operation:
Too small clearance may increase wheel wear, while excessive clearance may cause unstable movement.
The rope must be correctly positioned inside the wedge socket and drum groove.
Failure of limit protection may cause hook over-travel and damage the hoist.
Electric wire rope hoists are designed for vertical lifting only. Side pulling should be strictly avoided.
Proper installation is the foundation for safe and reliable operation of a double trolley electric wire rope hoist. From trolley adjustment and electrical connection to wire rope installation and limit switch calibration, every step directly affects equipment performance and service life.
With professional installation procedures and regular maintenance, a high-quality electric wire rope hoist can provide stable lifting performance for many years in industrial applications.
WY CRANE provides customized electric wire rope hoists, overhead cranes, gantry cranes, and complete lifting solutions with professional technical support and installation guidance for global customers.
The installation time depends on hoist capacity, crane structure, and site conditions. Standard installations can usually be completed within several hours to several days.
Before installation, check all components, trolley dimensions, beam compatibility, electrical connections, and lifting accessories.
The limit switch prevents over-travel of the hook and protects the hoist from mechanical damage.
No. Electric wire rope hoists are designed for vertical lifting only. Side pulling can damage the rope guide and reduce equipment life.
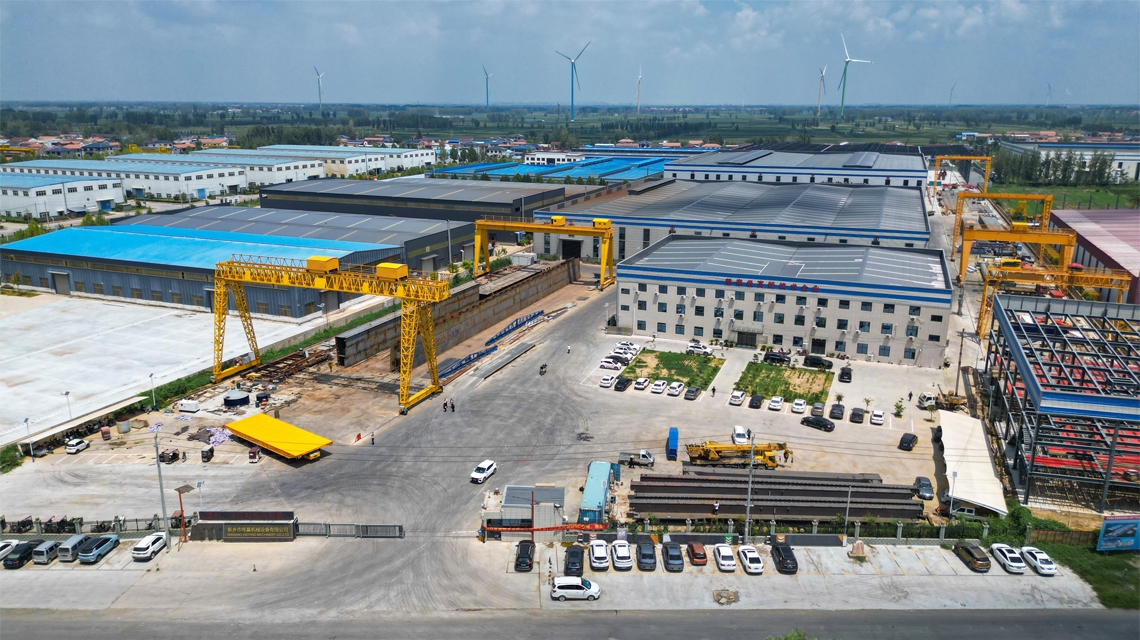
With 34 years of manufacturing experience and 12 years of export expertise, we have built a dual advantage of professional qualifications and a global presence. Our business covers more than 100 countries and regions across Asia, Europe, the Americas, Africa, and Oceania. We are certified under the ISO management system and hold CE product certifications. Our main product lines include six major series—electric hoists, electric winches, gantry cranes, bridge cranes, marine cranes, and portal cranes—comprising nearly 100 different models.
If you want to learn more, please contact us.
E-mail address: info@weiyinglift.com
Website: www.wycrane.com